Set Up Intercom
Intercom is usually the fastest channel to launch first. A solid setup means tickets arrive reliably and escalation behavior stays predictable.
Before You Start
Make sure you have:
- Access to Overview -> Channels -> Intercom.
- Basic knowledge and policy content loaded.
- At least one escalation path for sensitive cases.
Setup Steps
- Connect Intercom in Overview -> Channels -> Intercom.
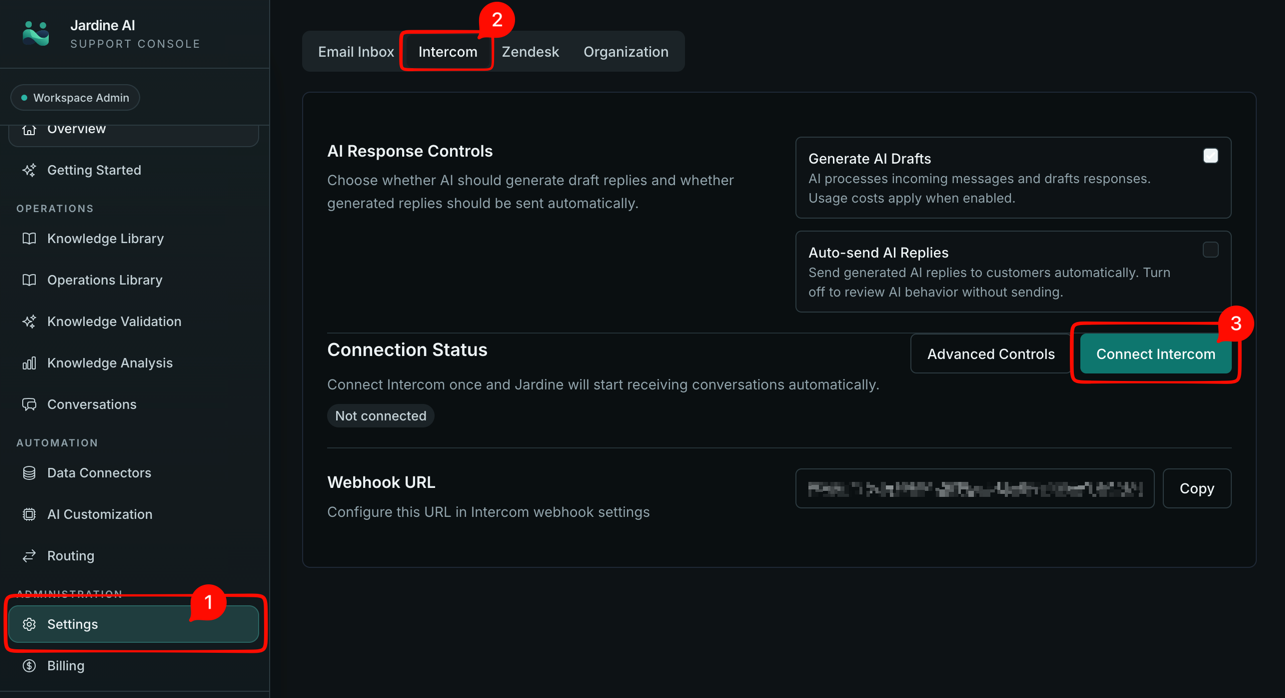
- Copy the webhook URL from Jardine.
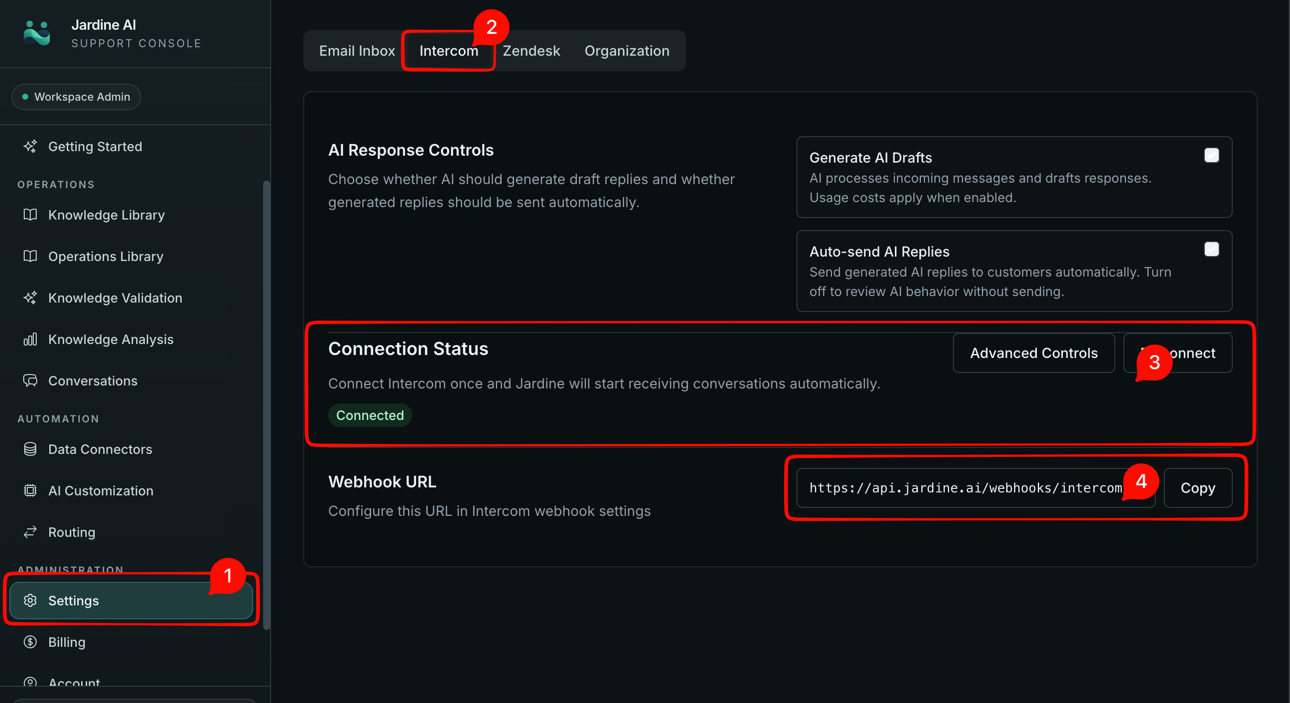
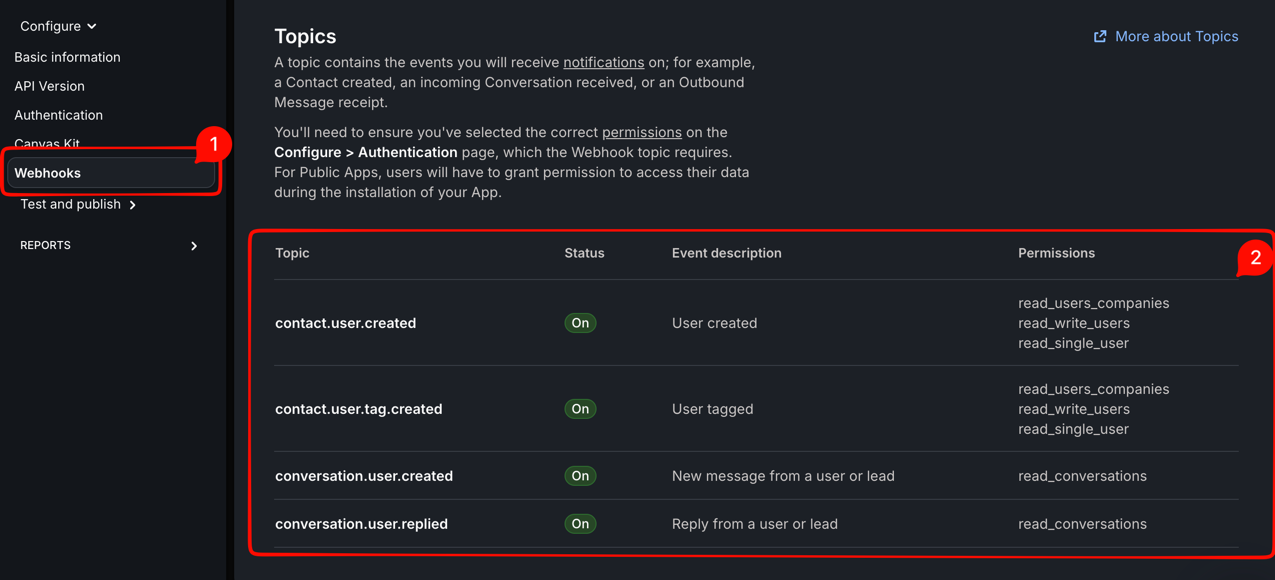
- Add that webhook in Intercom.
- Subscribe the required conversation events.
- Send test conversations: routine, unclear, and sensitive.
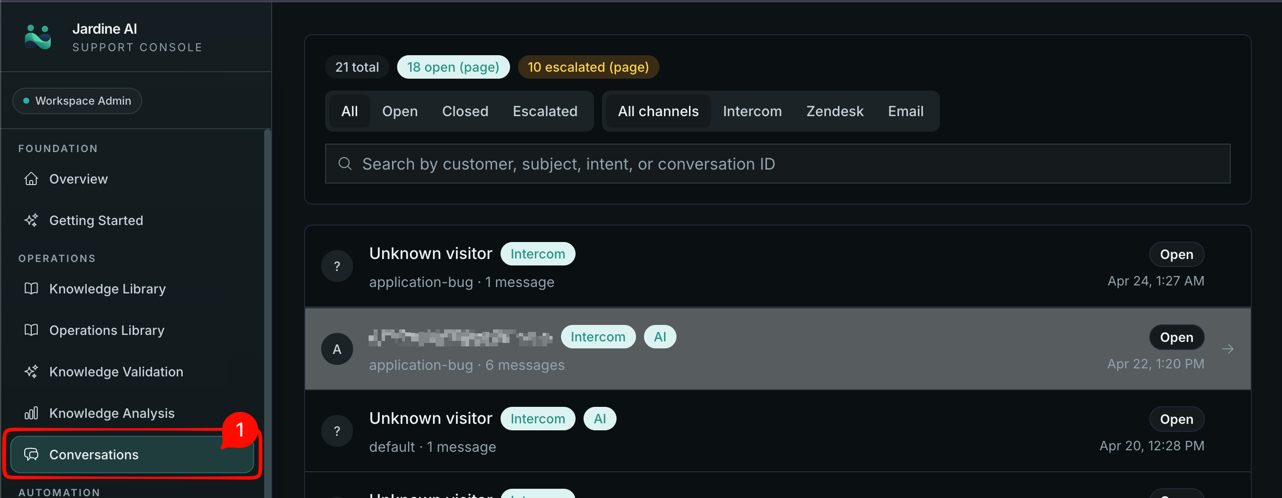
- Confirm threads appear in Conversations.
Required events:
conversation.user.createdconversation.user.repliedconversation.admin.repliedconversation.admin.notedconversation.admin.openedconversation.admin.closed
How To Know It Is Working
You are in a good state when routine tickets are handled well, sensitive cases escalate, and ownership transitions are clear.
If Something Is Off
Connected but no conversations arrive
Check webhook URL and event subscriptions first.
Conversations arrive but too many escalations happen
Check knowledge quality and routing rules before changing send settings.
Ownership feels stuck
Check owner state and handoff rules in conversation details.
Next Step
Continue with Routing Overview.